
Stripe Configuration
Paymery supports Stripe billing using Laravel Cashier. Stripe is optional and can be enabled only when needed. Manual payments work without Stripe.
Step 1: Enable Stripe from Admin Panel
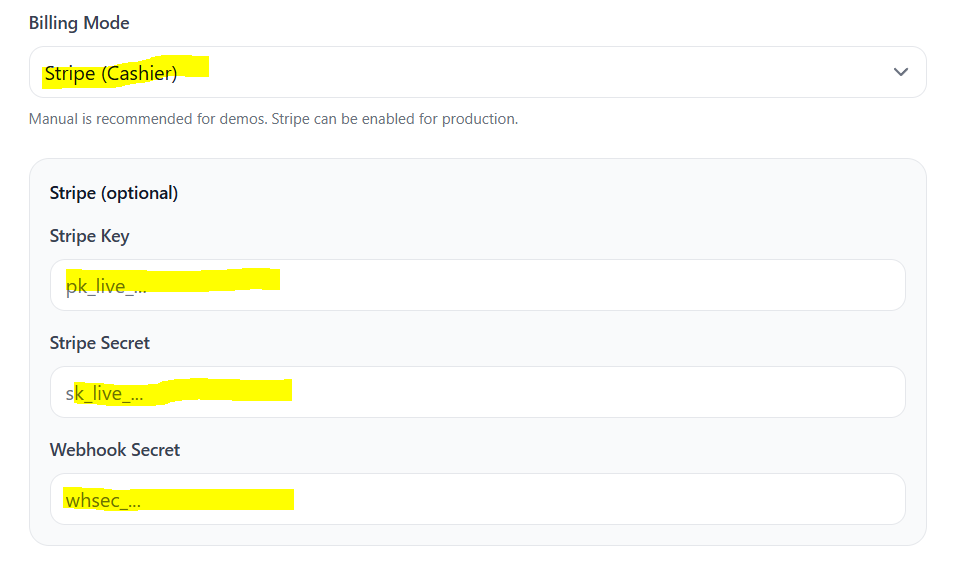
Stripe configuration is managed directly from the admin panel. Navigate to Admin → Settings → Billing and update the following:
- Set Billing Mode to Stripe (Cashier)
- Enter your Stripe Publishable Key
- Enter your Stripe Secret Key
- Enter your Webhook Secret (added later)
Example from the admin panel:
Step 2: Get Stripe API Keys (Test Mode)
Log in to your Stripe dashboard and enable Test Mode. Then copy the keys:
- Publishable Key (starts with
pk_test_) - Secret Key (starts with
sk_test_)
Paste these keys into the admin panel settings.

Step 3: Create Webhook Endpoint
Stripe billing updates (payments, renewals, cancellations, and invoice events) are synchronized using webhooks. You must create a webhook endpoint in your Stripe dashboard.
Navigate to Developers → Webhooks and click Add endpoint.
Webhook Configuration
- API Version: Use the default recommended API version for your Stripe account.
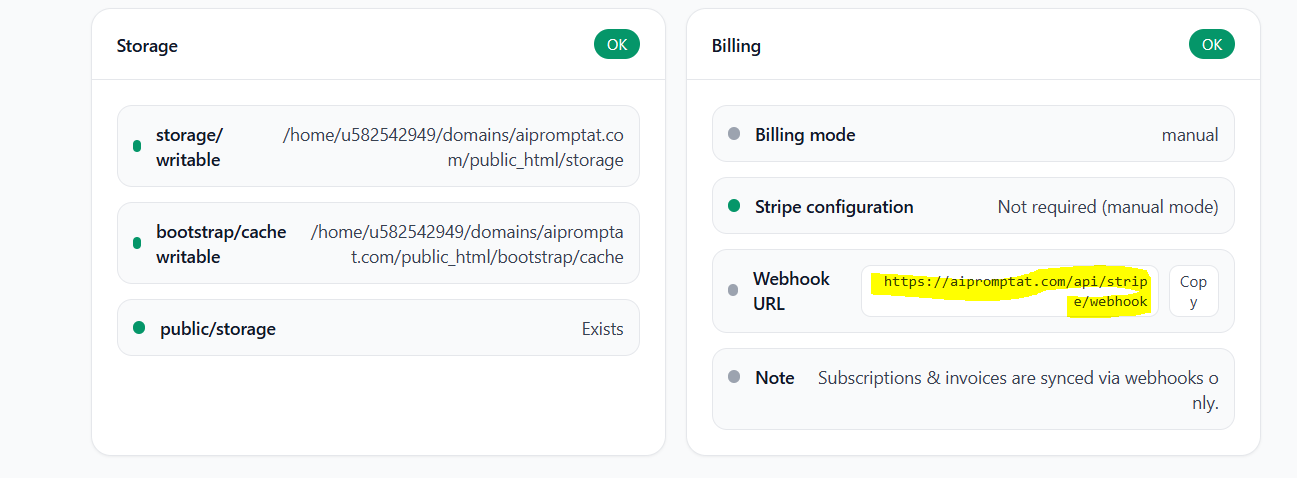
- Endpoint URL: Copy it from the System Health page in your Paymery admin panel.
Recommended events:
checkout.session.completedinvoice.payment_succeededinvoice.payment_failedcustomer.subscription.createdcustomer.subscription.updatedcustomer.subscription.deleted
When asked for the webhook endpoint URL, copy it from the System Health section in the Paymery admin panel.
After creating the webhook, Stripe will generate a Webhook Secret (starts with
whsec_).
Copy this value and paste it into the Stripe settings in the admin panel.
Step 4: Create Stripe Products & Prices
Each Paymery plan requires a corresponding Stripe Price ID (and it can be different per currency).
Navigate to Product Catalog → Add product in Stripe.
Product Setup
- Name: Use the same plan name as in Paymery
- Description: Optional
- Image: Optional
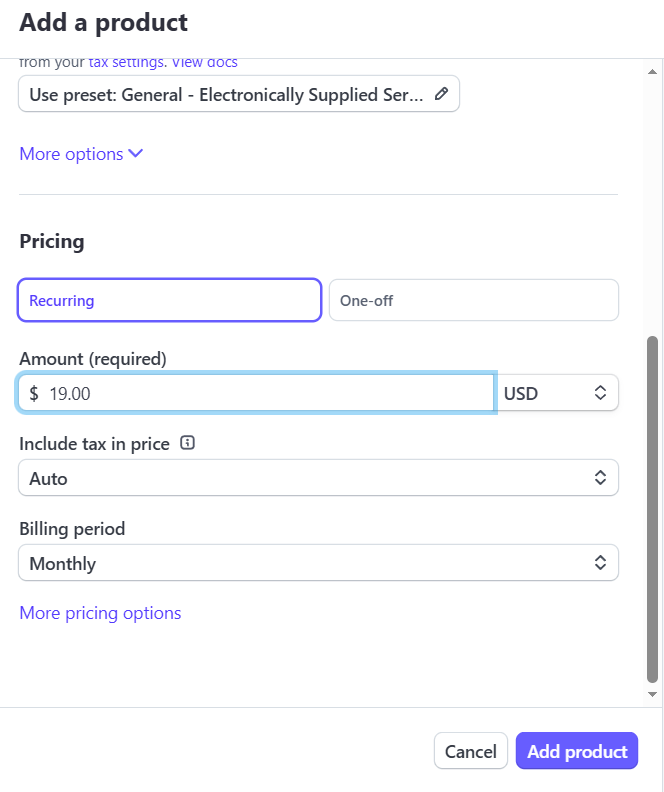
Pricing Setup
- Select Recurring
- Set the price amount
- Select the currency (e.g. USD)
- Choose billing period (Monthly / Yearly)
Step 5: Copy Stripe Price ID
After creating the price, open it in Stripe and copy the Price ID.

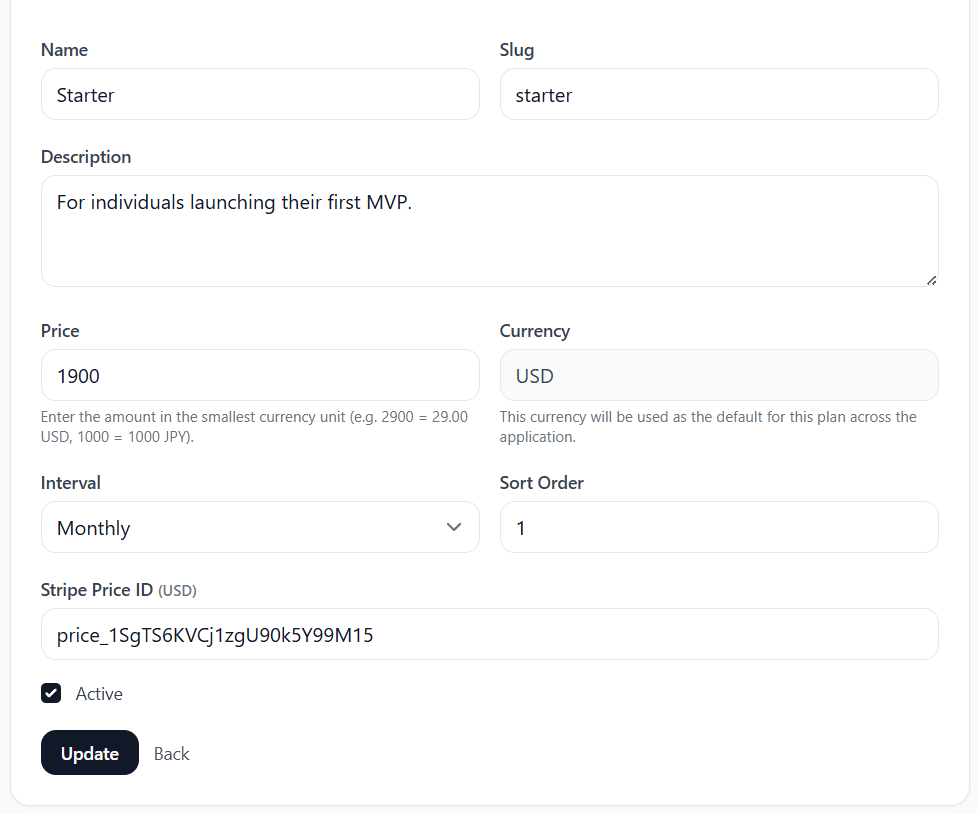
Step 6: Assign Price ID to Paymery Plan
In the Paymery admin panel, navigate to Admin → Plans, edit the corresponding plan, and paste the Stripe Price ID into the matching currency field.
Important Notes
- Stripe Test Mode and Live Mode use different keys and webhooks.
- Always ensure the currency in Stripe matches the active currency in Paymery.
- Billing updates are processed via webhooks.
- Manual payments do not require Stripe configuration.